25
章节25
实现 getStaticProps
Next.js 中的预渲染
Next.js 有两种预渲染形式:静态生成(Static Generation)和服务器端渲染(Server-side Rendering)。区别在于生成页面 HTML 的时间。
- 静态生成是一种在构建时生成 HTML 的预渲染方法。然后,预渲染的 HTML 会在每个请求中被重用。
- 服务器端渲染是一种在每个请求中生成 HTML 的预渲染方法。
重要的是,Next.js 允许你选择为每个页面使用哪种预渲染形式。你可以创建一个“混合”Next.js 应用,其中大部分页面使用静态生成,而其他页面使用服务器端渲染。
使用静态生成 (getStaticProps())
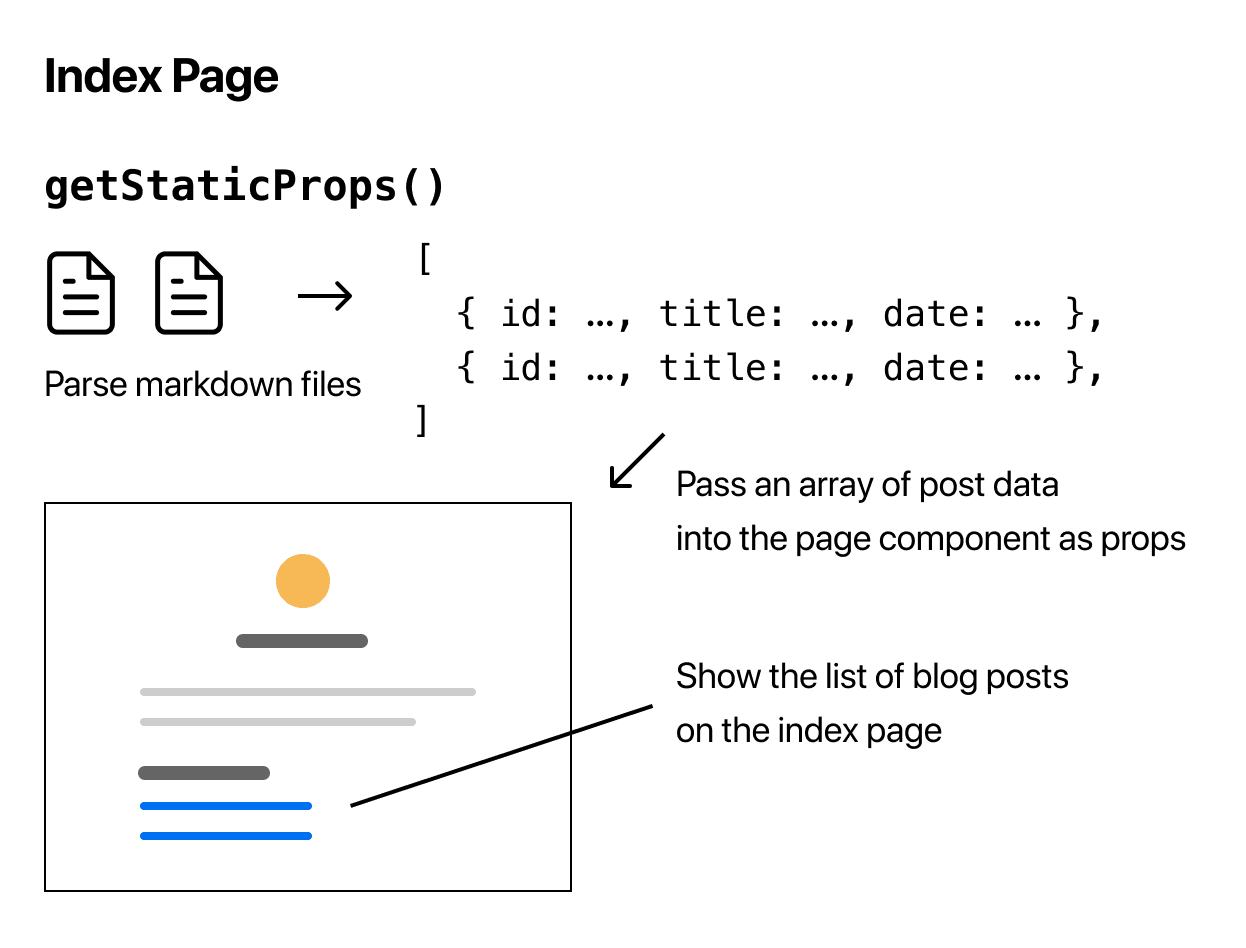
现在,我们需要在 pages/index.js 中添加对 getSortedPostsData 的导入,并在 getStaticProps 内部调用它。
在你的编辑器中打开 pages/index.js,并在导出的 Home 组件上方添加以下代码
import { getSortedPostsData } from '../lib/posts';

export async function getStaticProps() {
  const allPostsData = getSortedPostsData();
  return {
    props: {
      allPostsData,
    },
  };
}
通过在 getStaticProps 的 props 对象中返回 allPostsData,博客文章将作为 prop 传递给 Home 组件。现在你可以像这样访问博客文章
export default function Home ({ allPostsData }) { ... }为了显示博客文章,让我们更新 Home 组件,在自我介绍部分下方添加另一个包含数据的 <section> 标签。别忘了同时将 props 从 () 改为 ({ allPostsData })
export default function Home({ allPostsData }) {
  return (
    <Layout home>
      {/* Keep the existing code here */}

      {/* Add this <section> tag below the existing <section> tag */}
      <section className={`${utilStyles.headingMd} ${utilStyles.padding1px}`}>
        <h2 className={utilStyles.headingLg}>Blog</h2>
        <ul className={utilStyles.list}>
          {allPostsData.map(({ id, date, title }) => (
            <li className={utilStyles.listItem} key={id}>
              {title}
              <br />
              {id}
              <br />
              {date}
            </li>
          ))}
        </ul>
      </section>
    </Layout>
  );
}
现在,如果您访问 https://:3000,应该可以看到博客数据了。
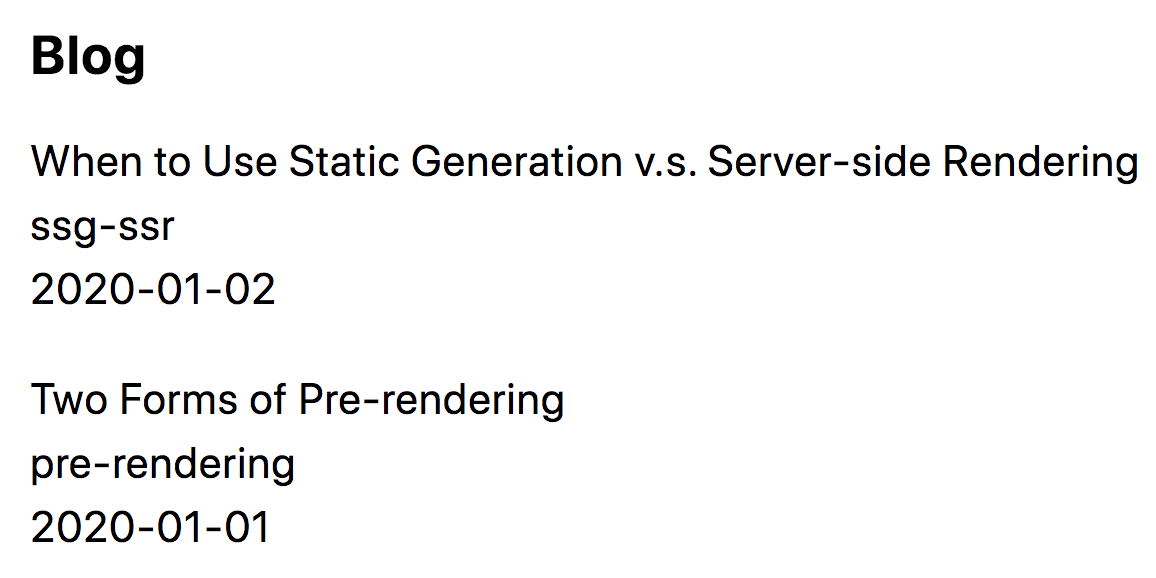
恭喜!我们已成功获取外部数据(来自文件系统)并使用这些数据预渲染了索引页。
我们将在下一页讨论使用 getStaticProps 的一些技巧。
这有帮助吗?